
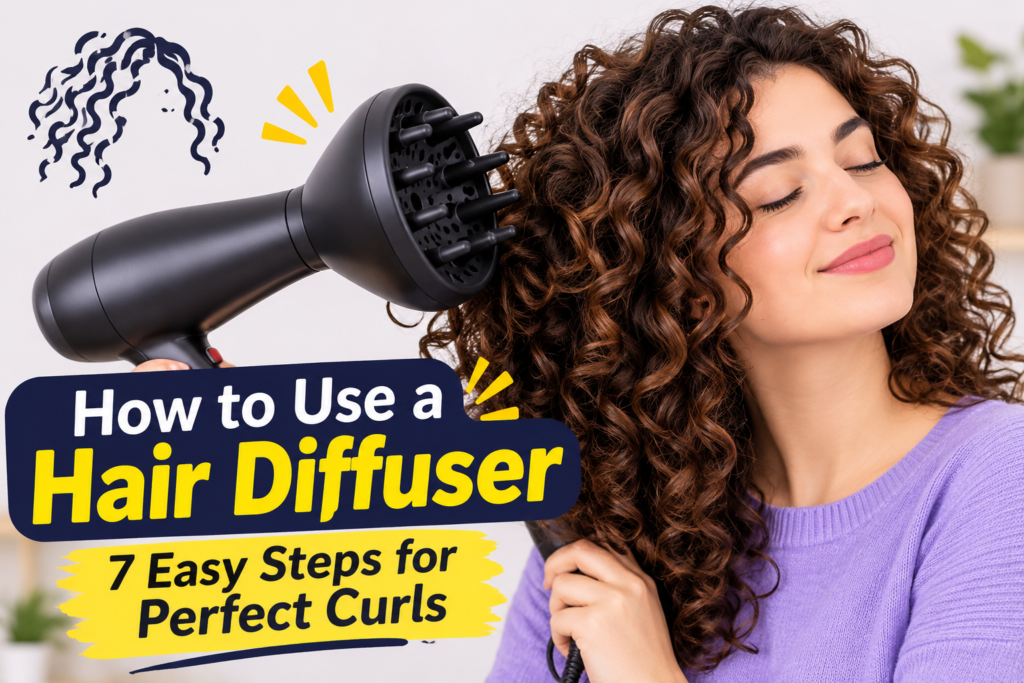
How to Use a Hair Diffuser: A Complete Beginner’s Guide to Beautiful, Defined Hair
Table of Contents
Introduction
If you have curly, wavy, or naturally textured hair, you may already know how difficult it can be to dry your hair without creating frizz. Regular blow dryers can sometimes make curls look messy, dry, or less defined. This is where a hair diffuser becomes useful.
A hair diffuser is a special attachment that fits onto the end of a blow dryer. It spreads the airflow over a wider area instead of directing strong air onto one small section of hair. This helps dry your hair more gently while maintaining its natural texture and shape.
Learning how to use a hair diffuser correctly can make a big difference in your hair routine. Whether you have loose waves, tight curls, or thick natural hair, a diffuser can help you achieve more defined curls, better volume, and a beautiful natural finish.
The good news is that using a diffuser is not difficult. You just need the right technique, suitable products, and a little patience.
In this guide, you will learn how to use a hair diffuser step by step, how to prepare your hair, which products to use, common mistakes to avoid, and helpful tips for getting the best results.
1. What Is a Hair Diffuser?
A hair diffuser is a round or bowl-shaped attachment designed to connect to a blow dryer. It usually has small holes or openings that allow air to flow gently around your hair.
Unlike a regular blow dryer nozzle, which concentrates airflow in one direction, a diffuser distributes air across a larger area.
This makes it especially helpful for people with curly and wavy hair because strong airflow can separate curls and create unwanted frizz.
Most hair diffusers have a bowl-shaped design with small fingers or prongs. These fingers help lift the roots, support curls, and distribute warm air throughout the hair.
Benefits of Using a Hair Diffuser
There are several reasons why people include a diffuser in their hair care routine.
- Reduces frizz: Gentle airflow can help prevent excessive movement that disrupts curl patterns.
- Improves curl definition: It helps curls maintain their natural shape while drying.
- Adds volume: Diffusing can lift the roots and make hair look fuller.
- Saves drying time: It can help dry naturally textured hair faster than air drying alone.
- Supports natural texture: It allows your natural waves and curls to remain visible.
- Creates a natural finish: It can help you achieve soft, defined curls without using excessive heat.
However, a diffuser does not automatically prevent heat damage. Using high temperatures or holding the dryer too close can still damage your hair.
2. Choose the Right Hair Diffuser
Before learning how to use a hair diffuser, it is important to choose one that works with your hair type and blow dryer.
Not every diffuser has the same design. Some are large and bowl-shaped, while others have longer fingers that help lift thick or curly hair.
Types of Hair Diffusers
1. Standard Bowl Diffuser
Hair Dryer Diffuser Attachment for Even Heat Distribution,Universal Hair Difuser – Walmart.com
This is one of the most common diffuser designs. It has a wide bowl that holds sections of hair while distributing air gently.
It works well for wavy, curly, and naturally textured hair.
2. Finger Diffuser
Ceramic + ion Hair Dryer – Olivia Garden
This diffuser has longer prongs that help lift hair near the roots. It is useful for people who want extra volume and fuller-looking curls.
3. Universal Diffuser
A universal diffuser is designed to fit different blow dryer models. Some versions have flexible or adjustable attachments.
Before purchasing one, check that it is compatible with your dryer.
3. Prepare Your Hair Before Using a Diffuser
Proper preparation is one of the most important steps for achieving beautiful results.
If you apply the right products and prepare your hair correctly, your curls are more likely to look defined, soft, and manageable.
Step 1: Wash Your Hair
Start by washing your hair with a shampoo that suits your hair type.
If your hair is dry or curly, consider using a moisturizing shampoo. If your scalp becomes oily quickly, choose a gentle shampoo that removes excess oil without making your hair feel overly dry.
Avoid rubbing your hair aggressively while washing.
Step 2: Apply Conditioner
After shampooing, apply conditioner to the middle lengths and ends of your hair.
Leave it on according to the product instructions and rinse thoroughly.
Conditioner helps make hair softer and easier to manage. It can also reduce tangles before styling.
Step 3: Remove Excess Water
Once you finish washing your hair, gently squeeze out extra water using your hands.
Avoid rubbing your hair with a regular towel because rough towel movements can disturb your natural curl pattern.
Instead, use a microfiber towel or a soft cotton T-shirt.
Gently press your hair to absorb excess moisture.
Step 4: Apply Leave-In Conditioner
A leave-in conditioner can help keep your hair soft and hydrated.
Apply a small amount throughout damp hair, focusing on the middle lengths and ends.
Do not use too much product because excessive buildup can make your hair look heavy or greasy.
Step 5: Apply Curl Cream or Styling Gel
If you want more defined curls, apply a curl cream or lightweight styling gel.
Curl cream helps improve softness and definition, while gel provides hold and helps curls maintain their shape.
You can also use mousse if you want additional volume.
Choose products according to your hair type and desired results.
Step 6: Apply Heat Protectant
Never skip heat protection when using a blow dryer.
A heat protectant helps reduce the risk of heat-related damage. Apply it evenly according to the product instructions before using your diffuser.
Remember that heat protectant does not completely eliminate the possibility of damage, so use a low or medium heat setting whenever possible.
4. How to Use a Hair Diffuser Step by Step
How to Get Rid of Frizzy Hair: Complete Step-by-Step Guide
Now that your hair is ready, it is time to start diffusing.
Follow these simple steps to dry your hair while maintaining its natural texture.
Step 1: Attach the Diffuser to Your Blow Dryer
First, attach your diffuser securely to the end of your blow dryer.
Make sure it fits properly and does not become loose during use.
If you have a universal diffuser, follow the manufacturer’s instructions to attach it correctly.
Step 2: Choose a Low or Medium Heat Setting
Turn on your blow dryer and select a low or medium heat setting.
Also, choose a low airflow setting if your dryer offers this option.
High heat and strong airflow can disturb your curls and increase the risk of dryness and damage.
For beginners, starting with low heat and gentle airflow is usually a good choice.
Step 3: Start Drying From the Ends
Догляд за волоссям після хімічної завивки або випрямлення: — TOTIS
Place the ends of your hair gently inside the diffuser bowl.
Bring the diffuser upward toward your scalp without squeezing or pressing too hard.
Hold it in place for several seconds, then move to another section.
This technique helps dry curls while keeping their natural shape.
Step 4: Work in Small Sections
Do not try to dry all your hair at once.
Divide your hair into smaller sections and work on each section separately.
For example, start with the back of your head, then move toward the sides and front.
Working in sections helps distribute airflow more evenly and prevents some areas from remaining wet.
Step 5: Lift Your Hair for More Volume
If you want fuller-looking hair, gently lift sections toward your scalp using the diffuser fingers.
Focus on the roots, especially if your hair tends to look flat.
Avoid pulling or stretching your curls because this can affect their natural shape.
Step 6: Keep the Diffuser Moving Gently
Move the diffuser slowly between different sections.
You do not need to move it constantly, but avoid keeping hot air focused on one area for too long.
A gentle, controlled technique is better than rushing through the drying process.
Step 7: Dry Until Your Hair Is Almost Completely Dry
Continue diffusing until your hair is around 80 to 90 percent dry, or until it reaches your preferred level of dryness.
If you have time, allow the remaining moisture to disappear naturally.
Some people prefer to diffuse until their hair is completely dry, while others stop earlier to reduce heat exposure.
Both approaches can work depending on your hair type and routine.
Step 8: Finish With Cool Air
20 Hairstyle Tweaks That Make You Look More Put-Together – SheFashionable
If your blow dryer has a cool-shot setting, use it briefly at the end.
Cool air helps finish the styling process without adding more heat.
Once your hair is dry, turn off the dryer before removing the diffuser.
5. How to Use a Hair Diffuser for Different Hair Types
Not every hair type responds to diffusing in the same way. Your technique should depend on your natural texture, thickness, and styling goals.
Diffusing Wavy Hair
Wavy hair often loses its natural shape when exposed to too much airflow.
If you have wavy hair:
- Apply lightweight leave-in conditioner.
- Use a small amount of mousse.
- Start with low airflow.
- Gently place sections inside the diffuser.
- Avoid touching your hair too much while drying.
This approach can help your waves look more defined without becoming overly fluffy.
Diffusing Curly Hair
Curly hair usually benefits from products that provide moisture and hold.
For better results:
- Apply curl cream to damp hair.
- Use styling gel for additional hold.
- Gently scrunch your curls.
- Place sections inside the diffuser bowl.
- Use low heat and low airflow.
Allow your curls to dry without repeatedly separating them with your fingers.
Diffusing Coily Hair
Coily hair often needs extra care because it can be prone to dryness and breakage.
Use a moisturizing leave-in conditioner and a suitable heat protectant.
Work in smaller sections and use gentle airflow.
Avoid pulling your hair while diffusing. If you want more root volume, lift the roots carefully without disturbing the ends.
Diffusing Fine Hair
Fine hair can become flat when too much heavy styling product is used.
Choose lightweight mousse or a small amount of leave-in conditioner.
Focus on lifting the roots gently with the diffuser.
Avoid applying too much cream or oil because these products may make your hair look greasy or weighed down.
Diffusing Thick Hair
Thick hair may take longer to dry because it contains more hair and can hold moisture for an extended period.
Divide your hair into several sections and work patiently.
You may need to lift the upper layers to reach the underneath sections.
Use a comfortable heat setting and avoid keeping the dryer in one position for too long.
6. Best Products to Use With a Hair Diffuser
How To Get Your Curls Back: 7 Easy Rules – Damila.com
4
Using suitable hair products can make diffusing easier and improve the final appearance of your hair.
Here are some useful products to consider.
1. Leave-In Conditioner
Leave-in conditioner provides extra conditioning after washing.
It helps improve softness and makes curls easier to manage.
Choose a lightweight formula if you have fine hair and a richer formula if your hair is thick or very dry.
2. Curl Cream
Curl cream is designed to support natural curl patterns.
It can make curls appear more defined and reduce the appearance of frizz.
Apply it to damp hair before using the diffuser.
3. Hair Mousse
Mousse is a good option if you want additional volume and lightweight hold.
It can be especially useful for wavy and fine hair.
Apply a small amount evenly throughout your hair.
4. Styling Gel
Styling gel helps hold curls in place while they dry.
Some gels create a temporary firm coating around the curls, often called a gel cast.
Once the hair is completely dry, you can gently scrunch the curls to soften that coating.
5. Heat Protectant
Heat protectant is an important part of a heat-styling routine.
It helps reduce the effects of heat exposure when used correctly.
Always follow the instructions on the product label.
7. Common Mistakes to Avoid When Using a Hair Diffuser
Although using a diffuser is relatively simple, beginners sometimes make mistakes that affect their results.
Here are some common mistakes and how to avoid them.
Using High Heat
One of the biggest mistakes is using maximum heat every time you diffuse.
High temperatures can contribute to dryness, roughness, and heat damage.
Solution: Start with low or medium heat and increase it only if necessary.
Using Too Much Airflow
Strong airflow can separate curls and create unwanted frizz.
Solution: Choose a gentle airflow setting and allow the diffuser to do its job slowly.
Touching Your Hair Too Much
Repeatedly touching or separating wet curls can disrupt their natural pattern.
Solution: Place your hair in the diffuser gently and avoid unnecessary movement.
Using Too Much Styling Product
Applying too much curl cream, gel, or conditioner can make hair feel sticky or heavy.
Solution: Start with a small amount and add more only when needed.
Skipping Heat Protectant
Using heat without protection may increase the risk of damage.
Solution: Apply a suitable heat protectant before diffusing.
Drying Your Hair in One Position
Keeping the diffuser in one position for too long can expose one section to excessive heat.
Solution: Move between sections and keep the dryer at a comfortable distance.
Brushing Your Hair After Diffusing
Brushing dry curls can separate their natural pattern and create a fluffy appearance.
Solution: Detangle your hair gently while it is wet and conditioned, using a suitable wide-tooth comb or your fingers.
8. How to Get More Volume With a Hair Diffuser
7 Tips voor het creëren van volume / Tips & Tricks | CGhair
If your hair looks flat near the roots, a diffuser can help create a fuller appearance.
Try these simple techniques.
1. Diffuse Your Hair Upside Down
Bend your head forward and allow your hair to fall naturally.
Gently place sections of hair into the diffuser bowl.
This can help lift the roots and create additional volume.
2. Use Root-Lifting Mousse
Apply a small amount of lightweight mousse near the roots before diffusing.
It can help support volume without making your hair feel too heavy.
3. Use the Diffuser Fingers
If your diffuser has longer fingers, gently position them near your scalp to lift the roots.
Do not scratch or pull your scalp.
4. Change Your Hair Parting
If you normally wear a middle part, try changing your parting slightly after your hair has dried.
This can make the roots look fuller.
5. Avoid Heavy Products
Heavy creams and oils can weigh down fine or wavy hair.
Use lightweight styling products when your main goal is volume.
9. How to Reduce Frizz When Diffusing Your Hair
Frizz is a common concern for people with naturally curly and wavy hair.
The good news is that a few simple changes can help improve your results.
- Start with properly conditioned hair.
- Apply a leave-in conditioner if suitable for your hair type.
- Use a curl cream or gel for definition.
- Avoid rubbing your hair with a rough towel.
- Choose low airflow settings.
- Do not repeatedly touch wet curls.
- Allow your hair to dry without constantly moving it around.
- Avoid excessive heat exposure.
Another helpful tip is to avoid separating your curls before they are completely dry.
If you want to soften a gel cast, wait until your hair is fully dry before gently scrunching it.
Remember that some natural frizz is completely normal. The goal is to manage frizz, not eliminate every flyaway.
10. Can You Use a Hair Diffuser Every Day?
You can use a hair diffuser regularly, but daily heat styling may increase the risk of dryness and damage.
How often you should use one depends on your hair condition, heat settings, and styling routine.
If you have dry, damaged, or chemically treated hair, consider reducing heat exposure.
You can also alternate between diffusing and air drying.
When using a diffuser, follow these precautions:
- Use the lowest effective heat setting.
- Avoid holding hot air in one place.
- Apply heat protectant.
- Do not use excessive heat to speed up drying.
- Give your hair breaks from heat styling.
If your hair feels unusually dry or brittle, reduce your heat-styling frequency and focus on conditioning.
11. How to Clean and Maintain Your Hair Diffuser
Cleaning your diffuser is another important part of your hair care routine.
Over time, product residue, dust, and loose hair can collect inside the attachment.
A dirty diffuser may affect airflow and make your styling routine less hygienic.
Follow these simple steps:
- Turn off your blow dryer and unplug it.
- Allow the diffuser to cool completely.
- Remove it from the dryer.
- Wipe the attachment using a soft, slightly damp cloth.
- Remove visible hair and product residue.
- Allow it to dry completely before attaching it again.
Always follow the manufacturer’s cleaning instructions.
Never put an electrical hair dryer or its electrical components in water.
12. Hair Diffuser vs. Regular Blow Dryer: What Is the Difference?
Many people wonder whether a diffuser is really different from a regular blow dryer.
Both tools use warm air to dry hair, but they distribute airflow differently.
| Feature | Hair Diffuser | Regular Blow Dryer |
|---|---|---|
| Airflow | Spreads air over a wider area | Often concentrates airflow |
| Curl definition | Helps maintain curl patterns | Can disturb natural curls |
| Frizz control | Can help reduce frizz | Strong airflow may increase frizz |
| Volume | Helps lift roots | Depends on styling technique |
| Best for | Wavy and curly hair | Different hair types and styles |
A diffuser is especially useful when you want to maintain your natural waves or curls.
A regular blow dryer can be more suitable for straightening and other blow-dry styles when used with the appropriate attachments.
13. Helpful Tips for Beginners Using a Hair Diffuser
If you are using a diffuser for the first time, do not worry about getting perfect results immediately.
Learning the right technique takes practice.
Here are some additional tips to make your experience easier.
- Start with clean, damp hair.
- Use a microfiber towel to remove excess water.
- Apply styling products evenly.
- Always use heat protection.
- Begin with low heat and low airflow.
- Work in small sections.
- Avoid stretching or pulling your curls.
- Try diffusing upside down for more root volume.
- Do not touch your curls repeatedly while drying.
- Allow your hair to cool before final styling.
Most importantly, experiment with different techniques to discover what works best for your natural hair texture.
14. Frequently Asked Questions About Using a Hair Diffuser
1. Is a Hair Diffuser Good for Curly Hair?
Yes. A hair diffuser is especially useful for curly hair because it distributes airflow gently and helps maintain natural curl patterns. It can also improve definition and volume.
2. Should I Use a Diffuser on Wet or Dry Hair?
A diffuser is generally used on damp, freshly washed hair. Remove excess water with a soft towel before applying styling products and beginning the drying process.
3. Do I Need Heat Protectant Before Diffusing?
Yes. It is a good idea to use a suitable heat protectant before applying heat to your hair. It helps reduce the risk of heat-related damage.
4. Can a Diffuser Make Straight Hair Curly?
A diffuser cannot permanently turn straight hair into naturally curly hair. However, with suitable styling products and scrunching techniques, it may help create temporary waves or texture.
5. How Long Does It Take to Diffuse Hair?
Drying time depends on your hair length, thickness, density, and moisture level.
Fine or short hair may dry relatively quickly, while thick or long hair may take longer.
6. Should I Diffuse My Hair Upside Down?
You can diffuse your hair upside down if you want additional root volume.
However, this technique is optional. If it creates tangles or makes your curls messy, use an upright position instead.
7. Is Low Heat Better for Diffusing?
Low heat is generally a good starting point because it reduces unnecessary heat exposure. You can use medium heat if needed, while keeping the airflow gentle.
8. Can I Use a Hair Diffuser Without Curl Products?
Yes. You can use a diffuser without curl cream or gel. However, styling products may help improve curl definition, reduce frizz, and provide longer-lasting hold.
9. Does a Hair Diffuser Reduce Frizz?
A diffuser can help reduce frizz by distributing airflow more gently than a concentrated dryer nozzle. However, your hair products, technique, and natural hair texture also affect the final results.
10. Is Air Drying Better Than Diffusing?
Both methods have advantages. Air drying avoids direct heat exposure, while diffusing can speed up drying and help shape curls. Choose the method that works best for your hair and routine.
Conclusion
Learning how to use a hair diffuser is a simple way to improve your hair styling routine, especially if you have naturally wavy, curly, or coily hair.
The key is to prepare your hair properly, apply suitable styling products, use heat protection, and choose a low or medium heat setting. Work in small sections and avoid touching your curls too much while they dry.
You can also experiment with different techniques, such as diffusing upside down or lifting your roots for extra volume.
Remember that every hair type is different. What works perfectly for one person may not produce the same results for another.
With the right technique and a little practice, a hair diffuser can help you achieve beautiful, defined, and natural-looking hair at home.
Read Next